How to create and use your own Virtual Room for Teletherapy using Google Slides
What are Virtual Rooms?
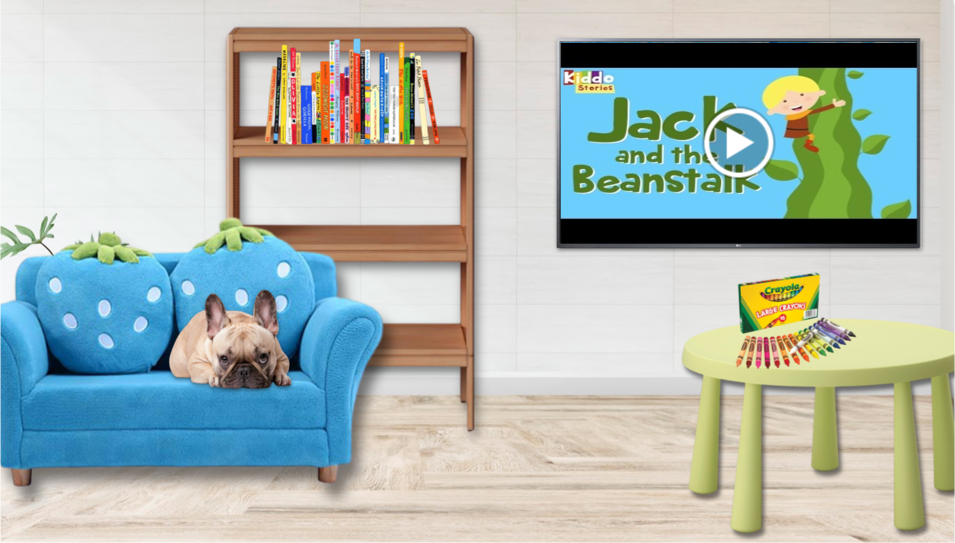
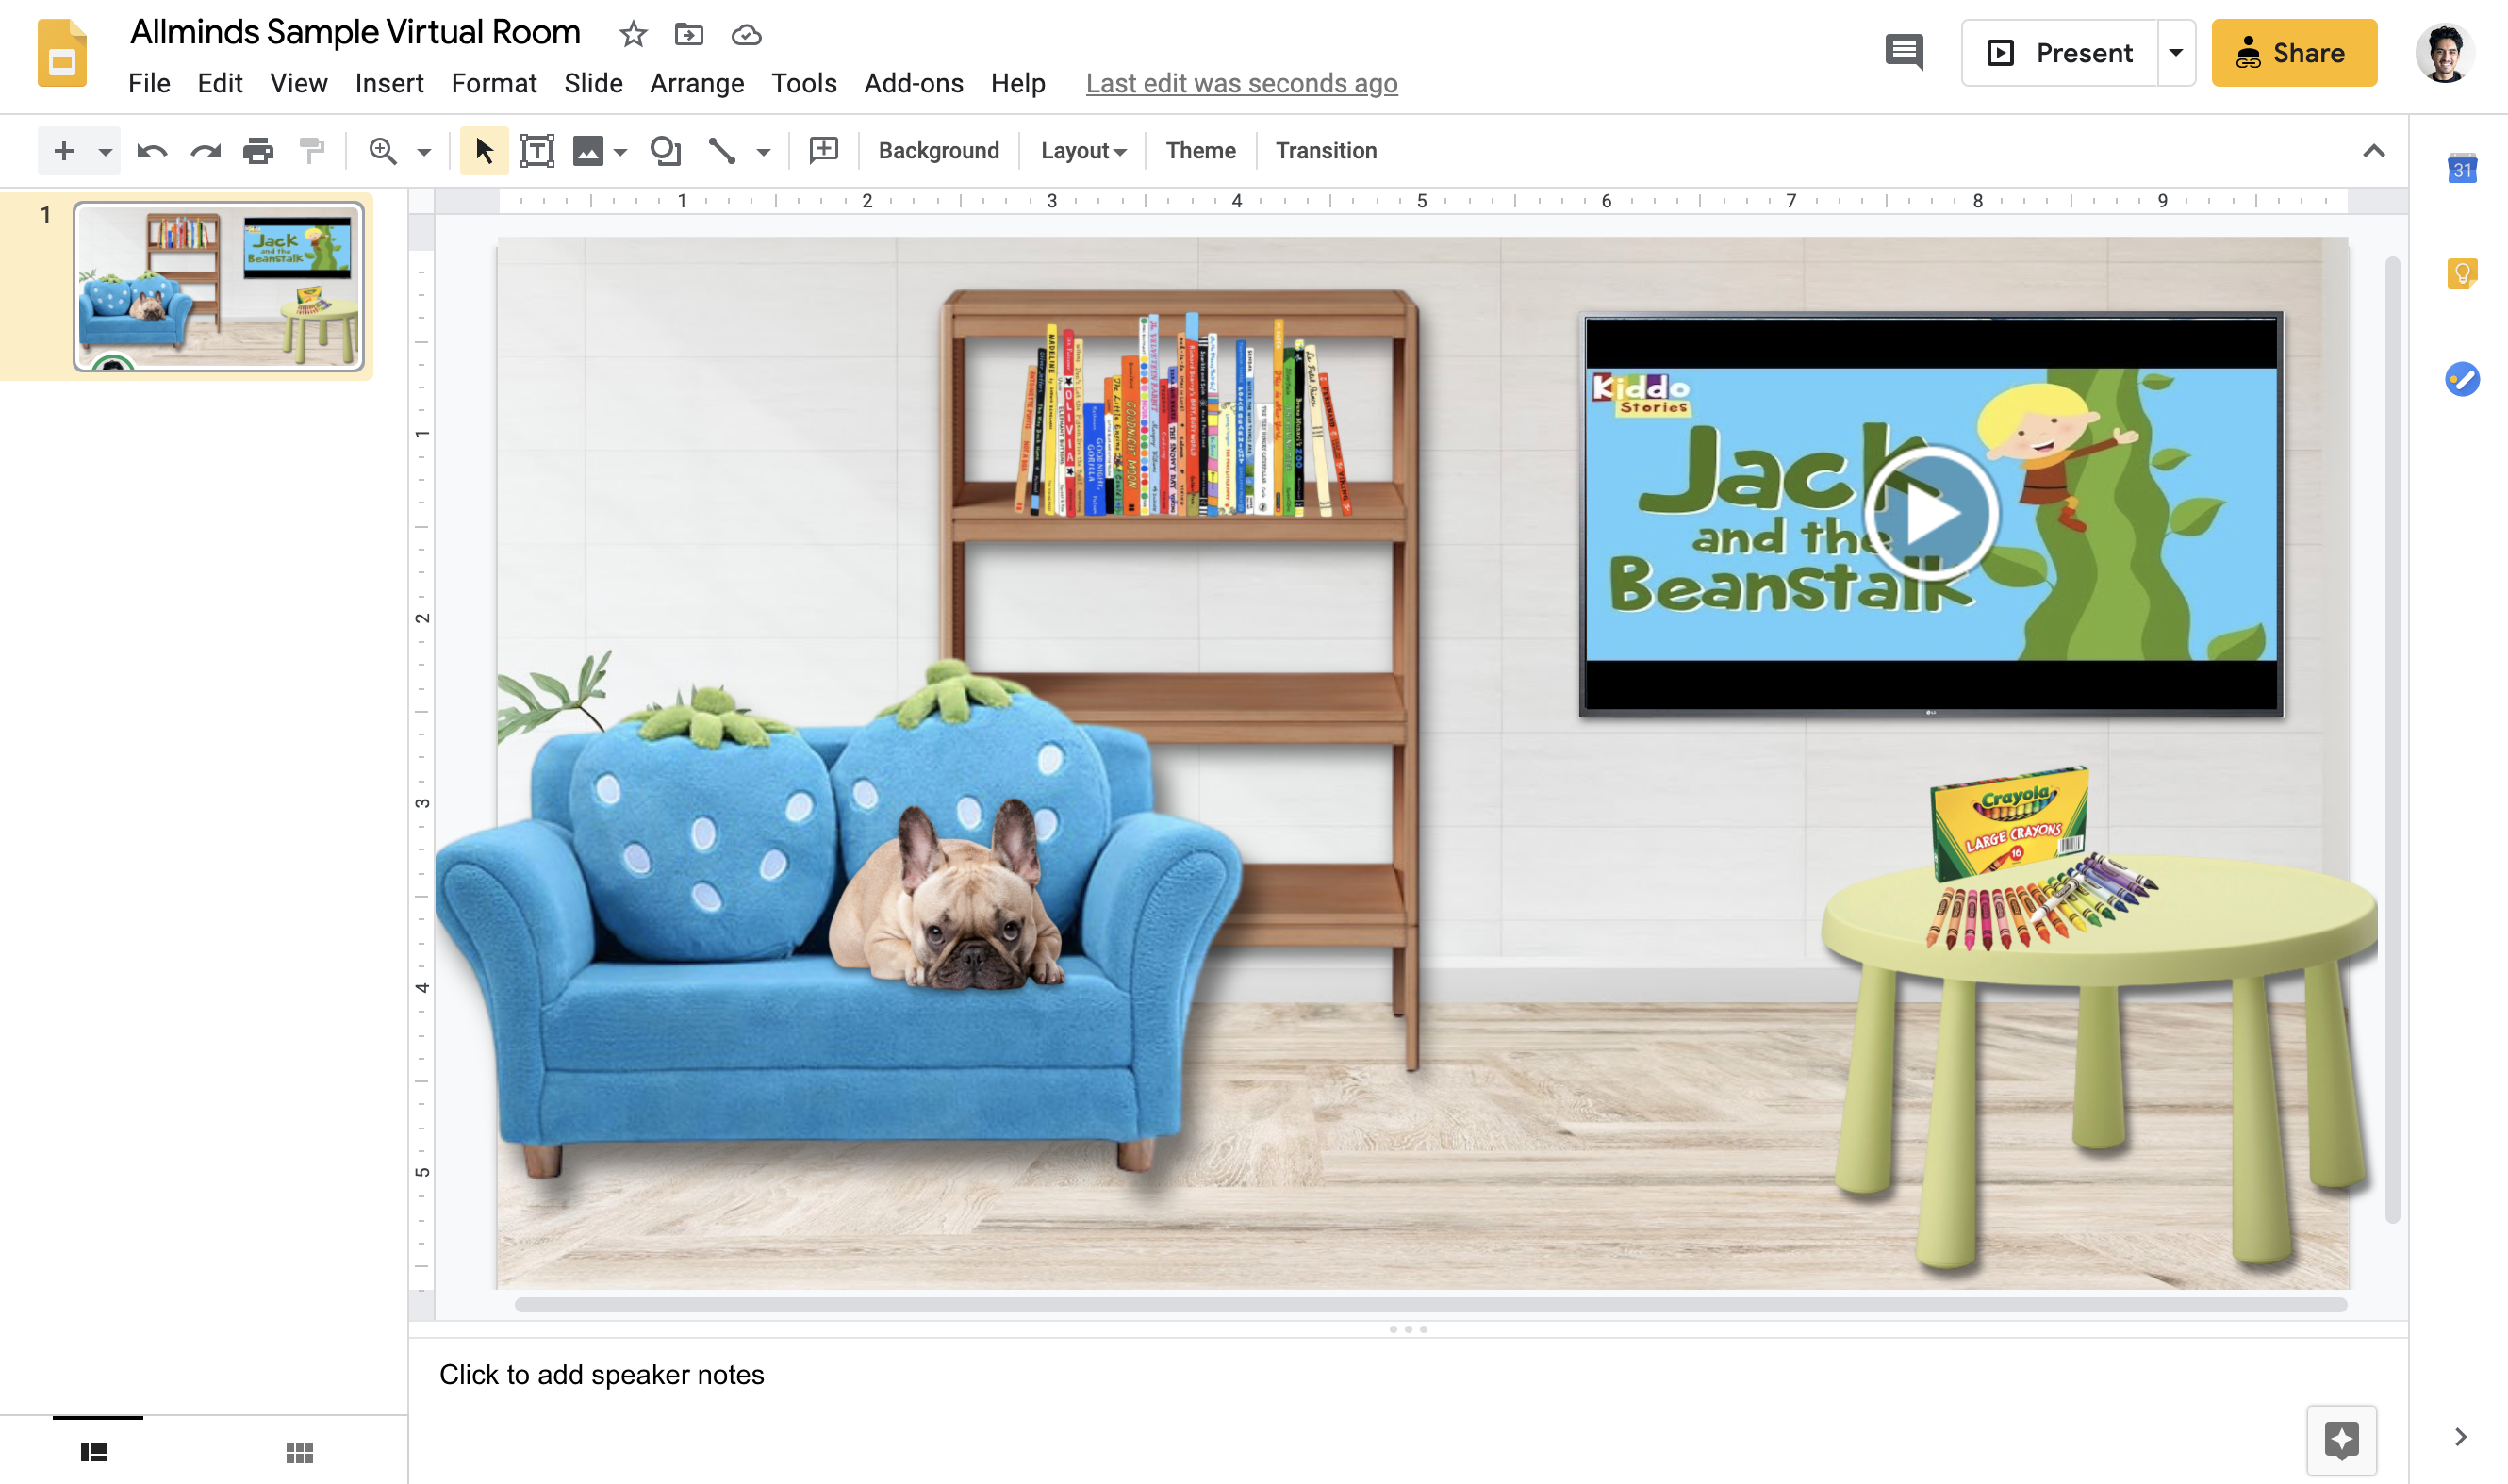
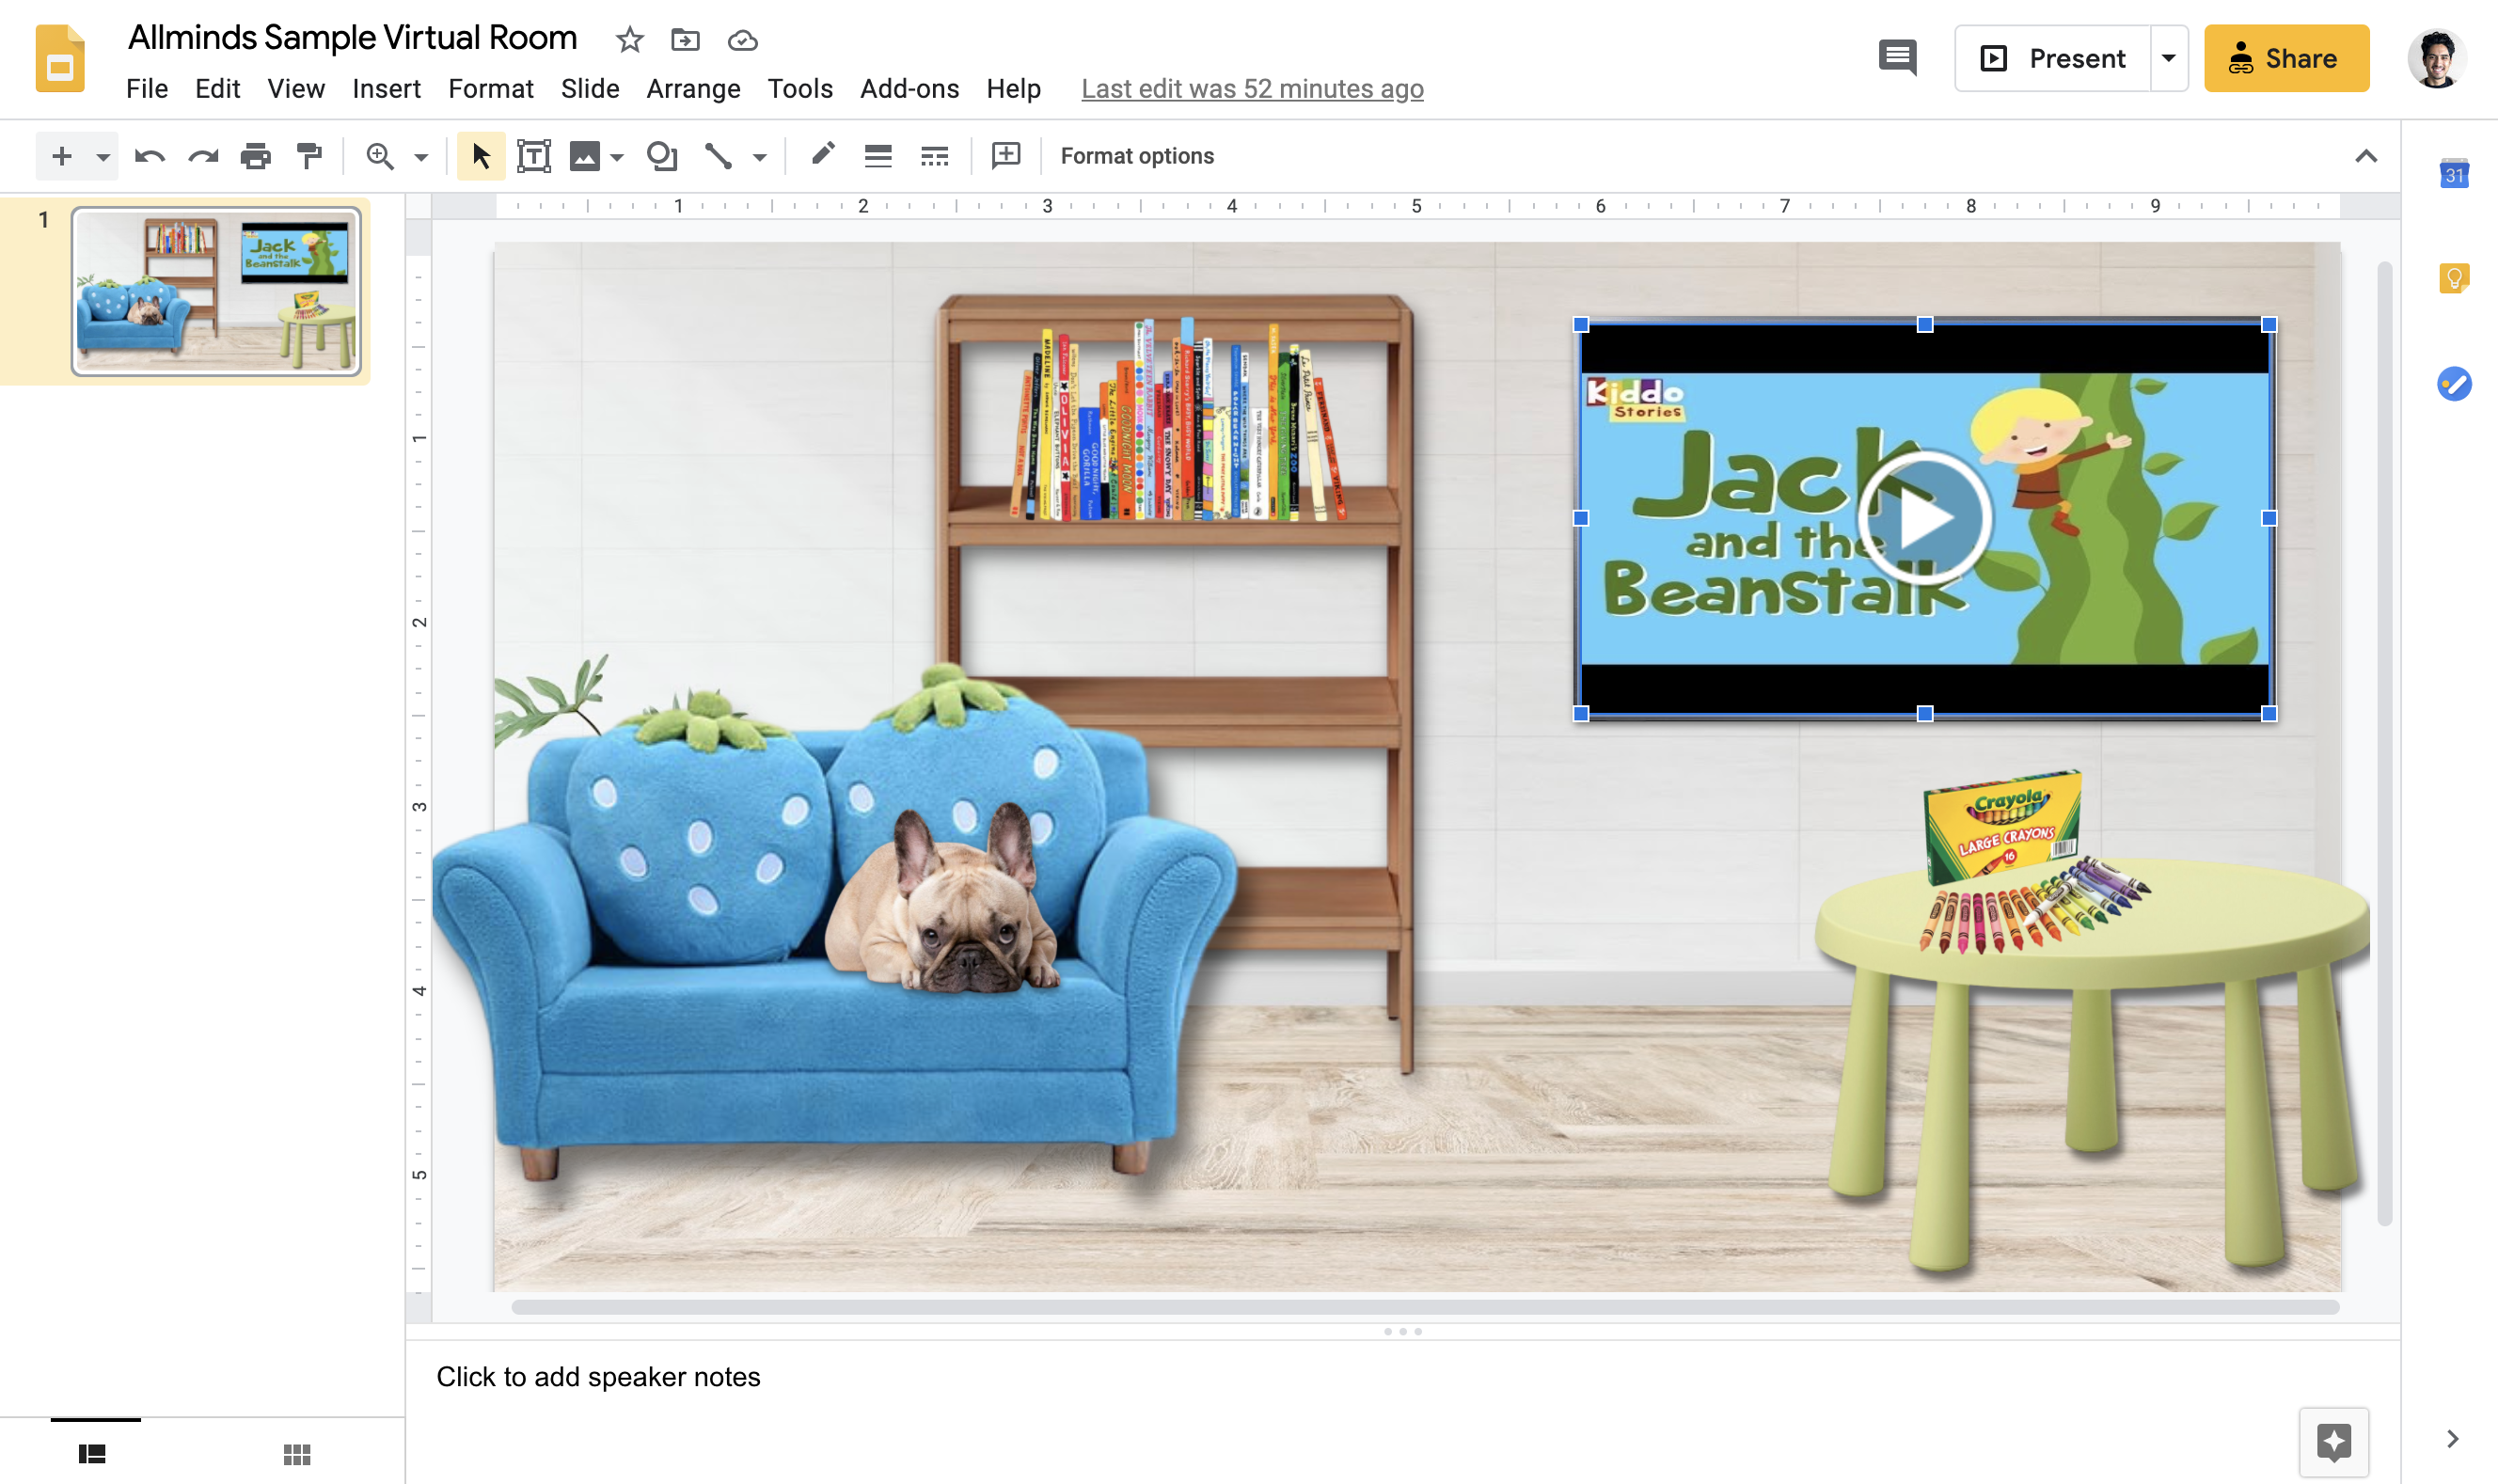
Virtual Rooms are a digital interface simulating a physical playroom. They can be used in Teletherapy to let your young clients interact with different resources (books, videos, songs, games...) while remaining engaged in their session. For example, you could have different books that your clients can click on and then read with you.
What do I need to use Virtual Rooms?
We’ll show you how to create your own Virtual Room further along this guide, but first let’s go over a few requirements. To use virtual rooms during your sessions, you will need to use a Telehealth option that supports screen sharing functionality. That is because you will be asking your clients to open the virtual room on their device, and then share their screen with you so you can see what they are doing.
We recommend you use Allminds since it is tailor-made for therapists, and it let’s you see your client even while they are sharing their screen with you!
The other requirement is that your client should be on a laptop or desktop because mobile devices do not allow screen sharing.
Virtual Rooms look amazing! How do I get one?
If you’ve made a Powerpoint or Google Slides presentation, then you should be able to easily make your own Virtual Room. If not, don’t worry! We’ve set-up a simple room that you can customize to your liking by using the following step-by-step instructions.
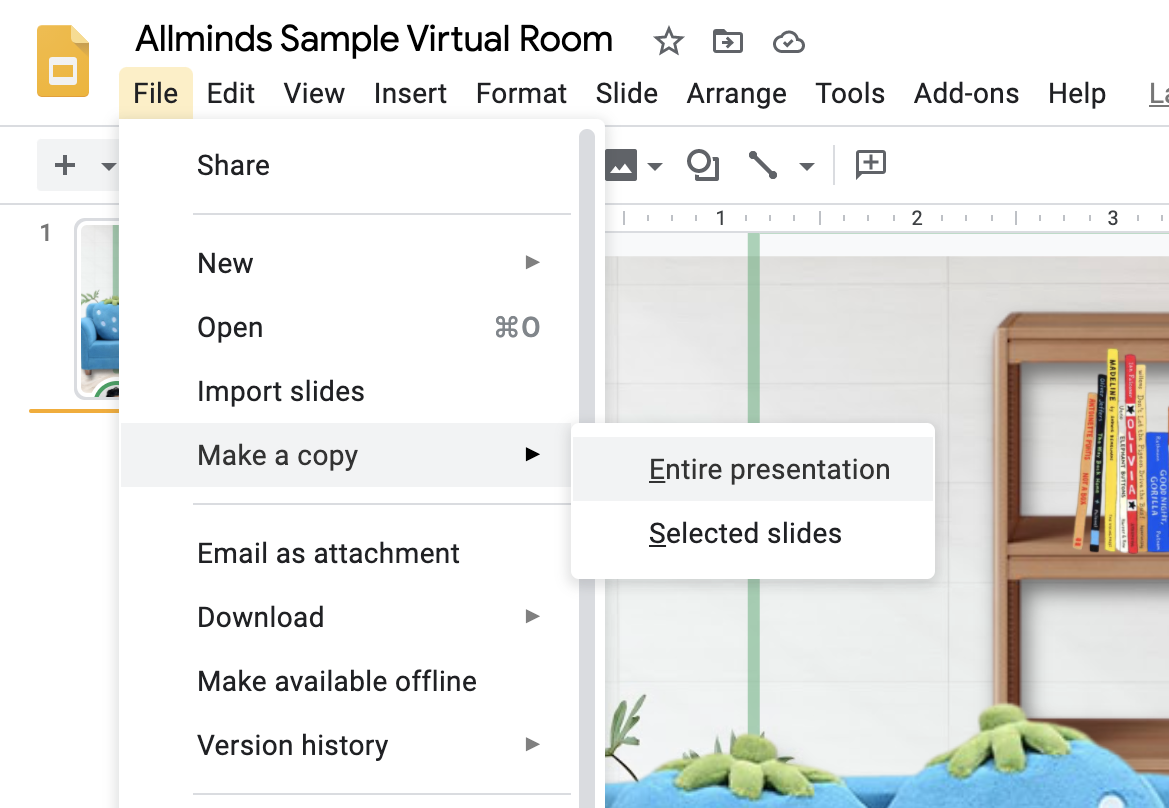
1. Open the Allminds Virtual Room and make a copy for yourself.
You will need to be signed in to a Google account (like Gmail).
2. Add new objects to your room
Find a picture of your object on google and save it to your computer. For best results, find one with a plain background. For example:

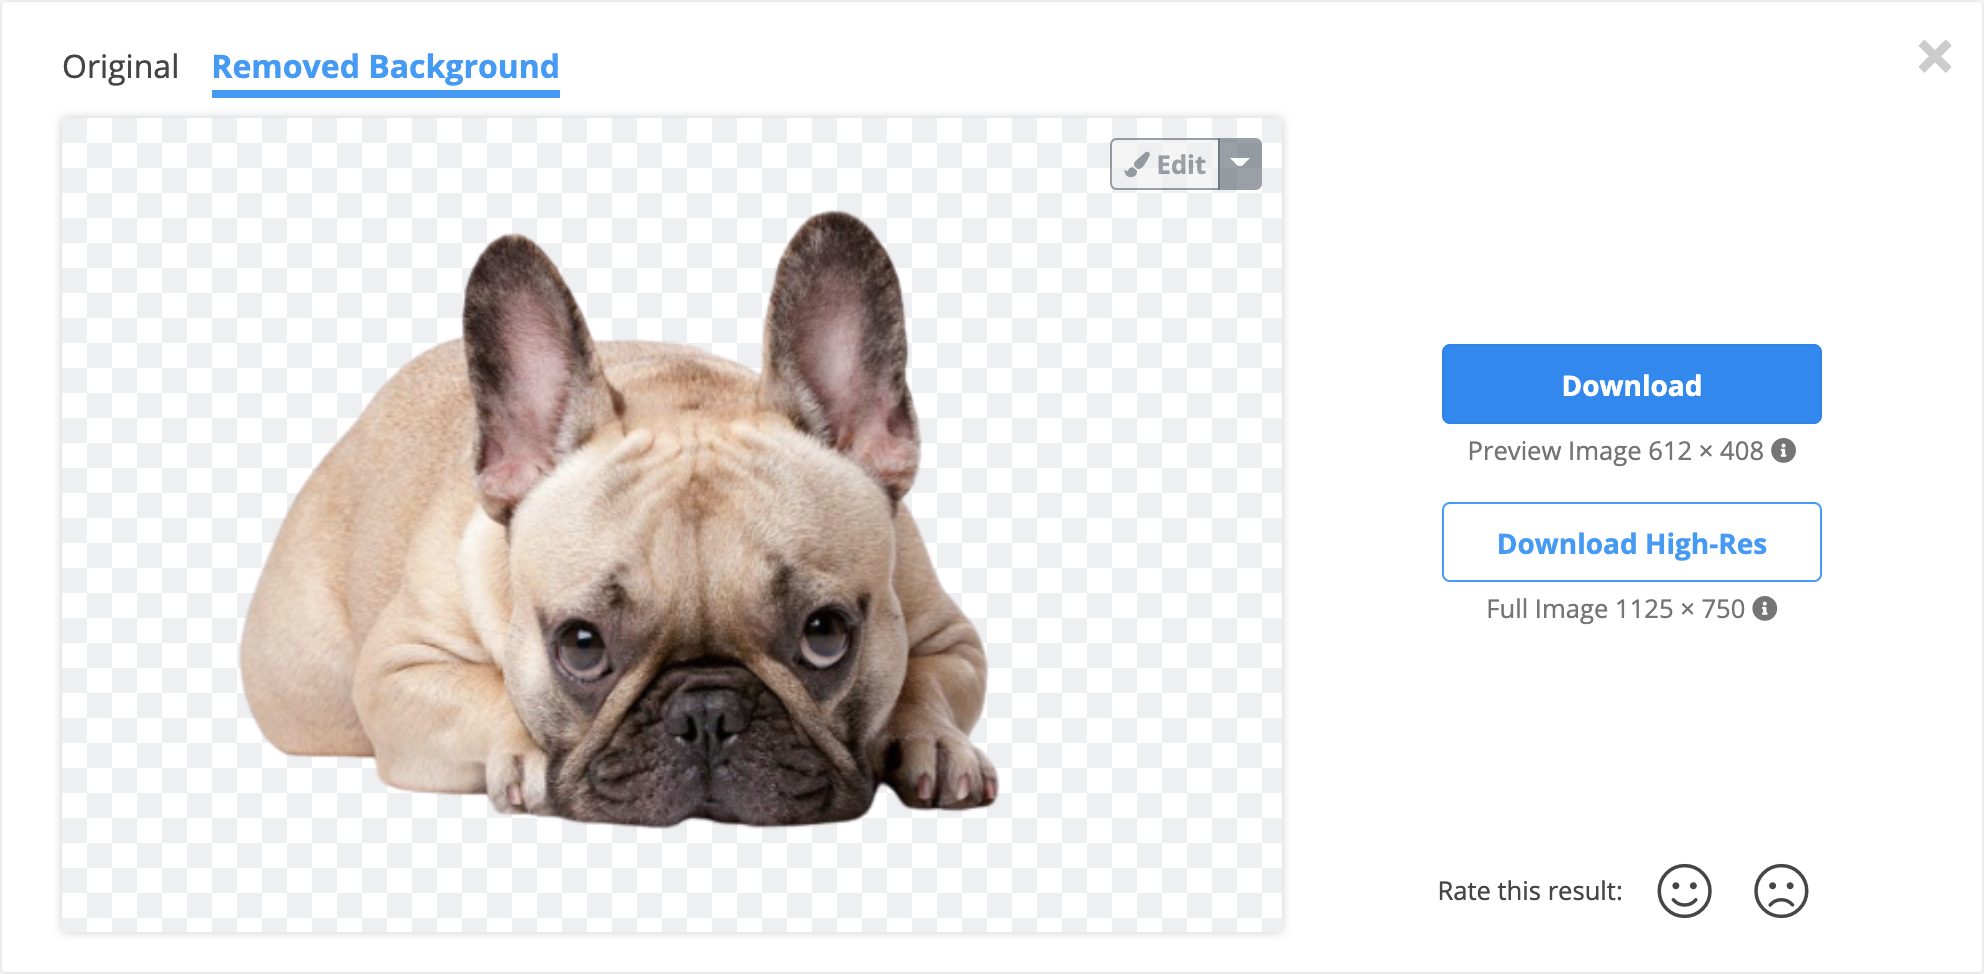
Our picture has a white background, which we want to remove. Luckily, We can use a free online tool for that. Open remove.bg and drag and drop your saved image onto it.

Tada! Click download to get your new, background-less image.
Now, drag and drop the new image you just downloaded into your virtual room.
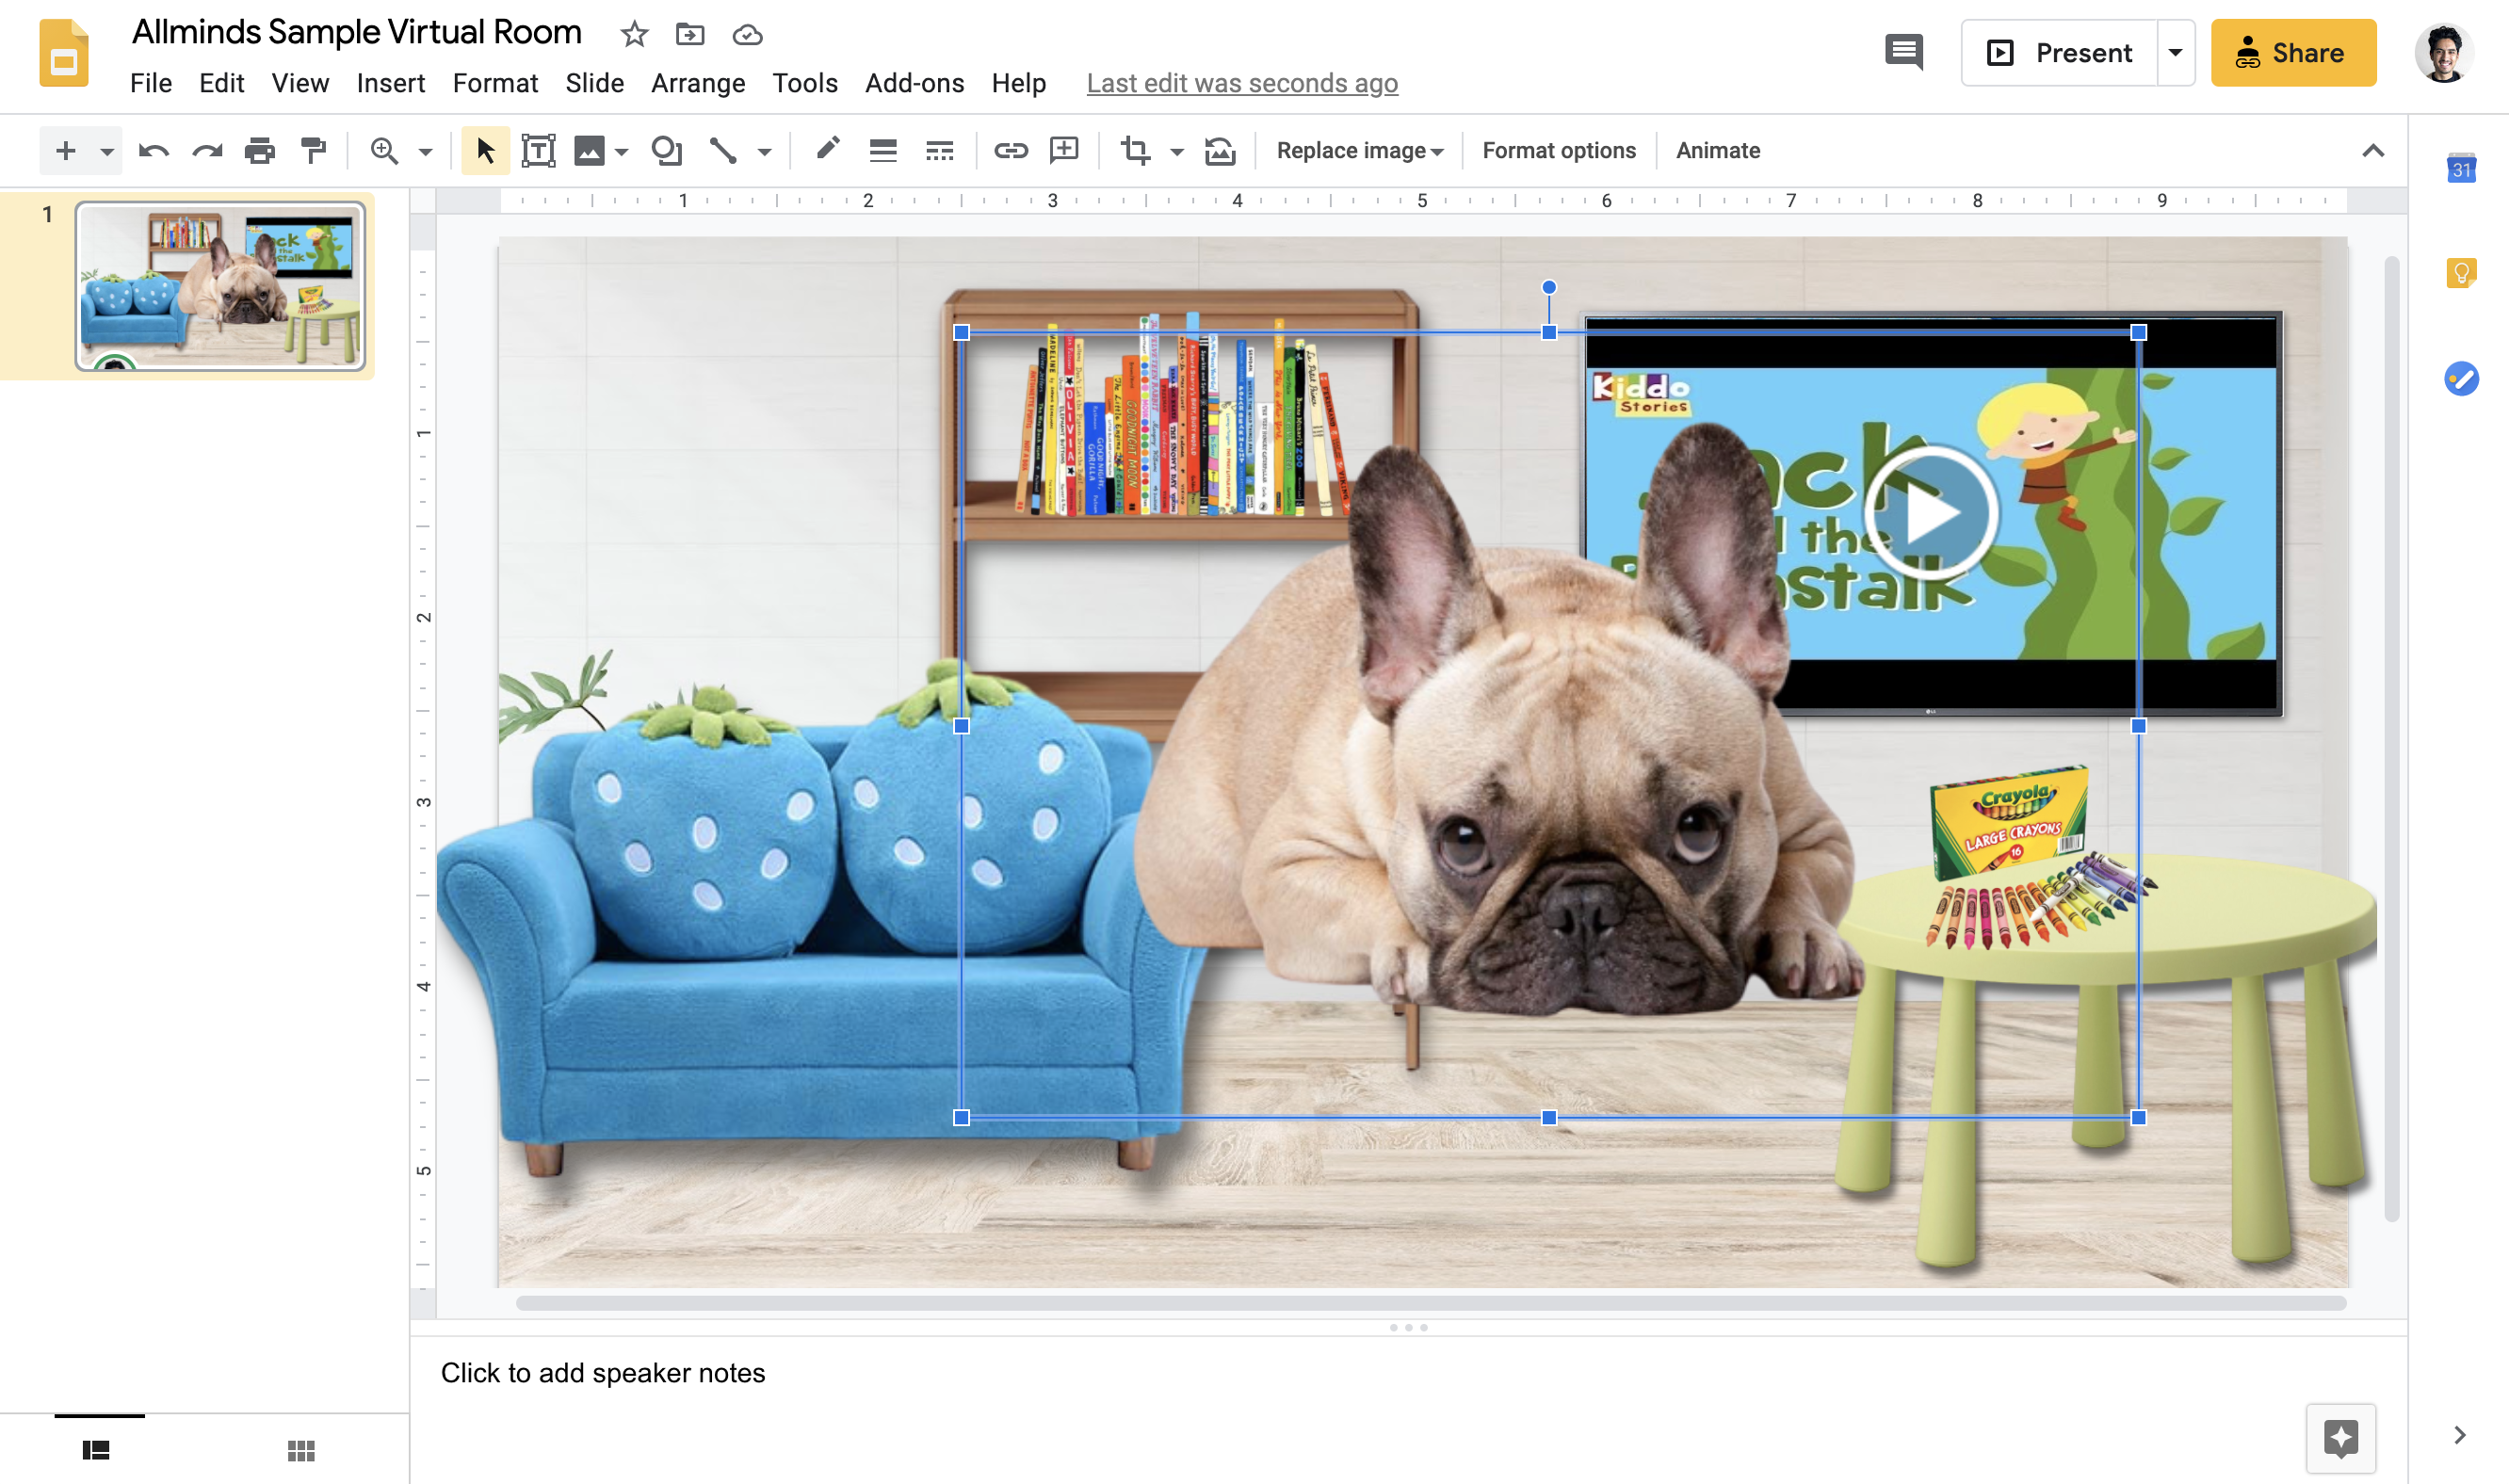
That doesn’t look right! Click and drag the corners of the blue box to resize your image and position it somewhere nice :)
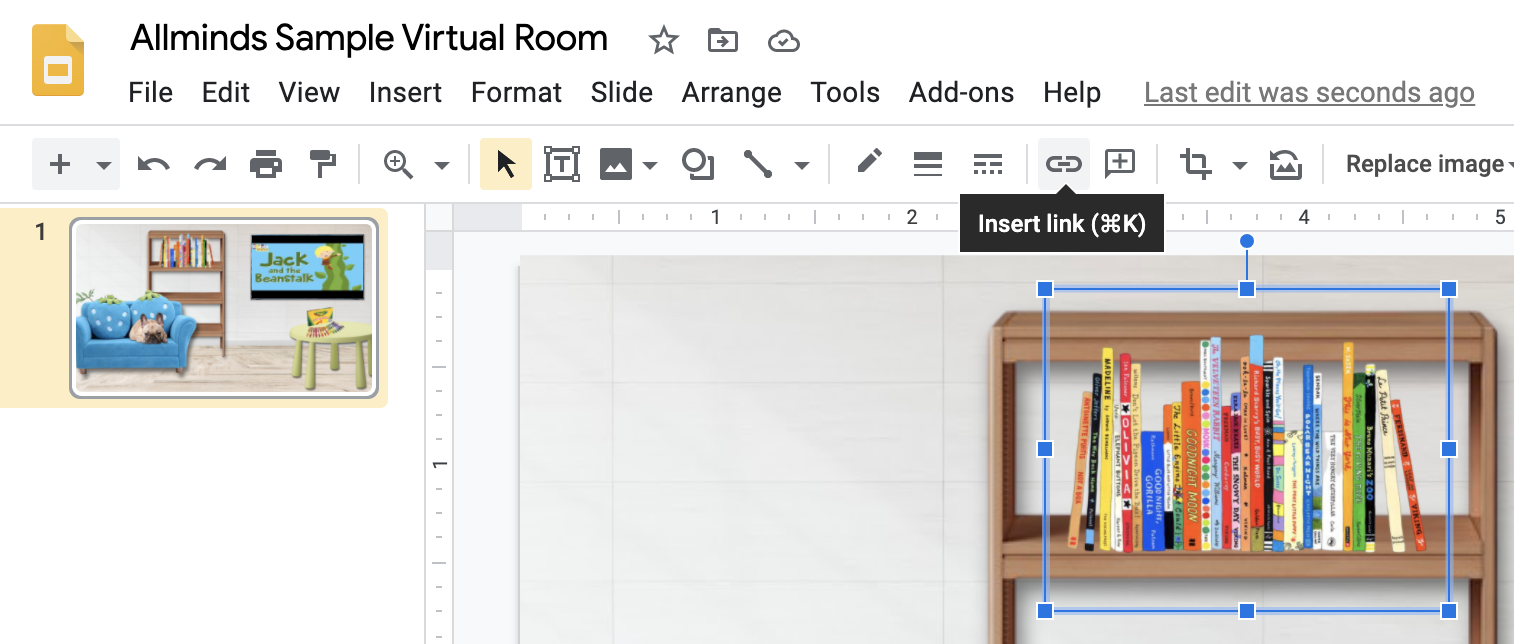
3. Add hyperlinks to your images
If you want your virtual room to be interactive, then you will have to link your images to pages on the internet! Here's how to do this. Don't worry, it's quite easy :)
Click on the image that you want to link, then click the "Insert Link" button on the top toolbar
Next, past the link that you want to use in the field that just popped up, and click Apply.
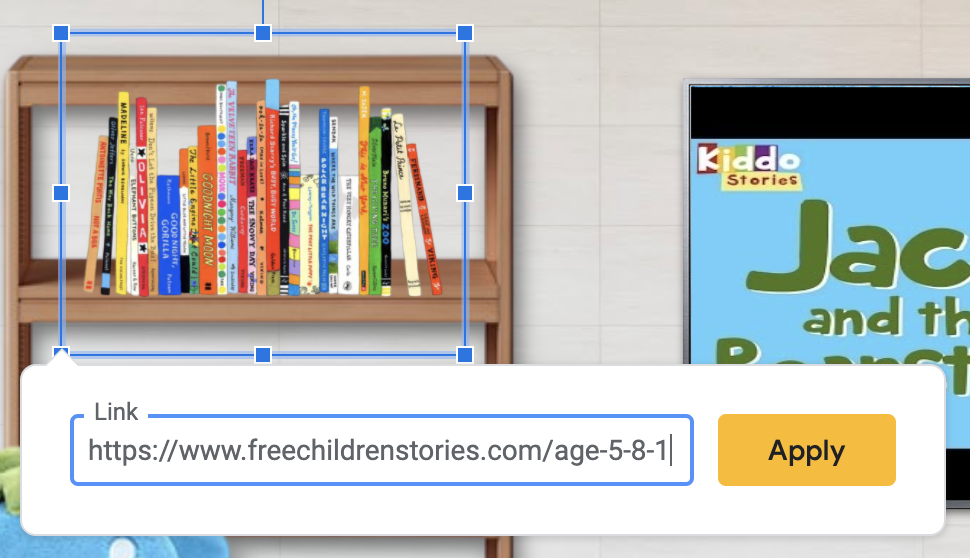
Voila! Your image will now redirect to the link you chose when it is clicked on (you have to be in present mode for this to work).
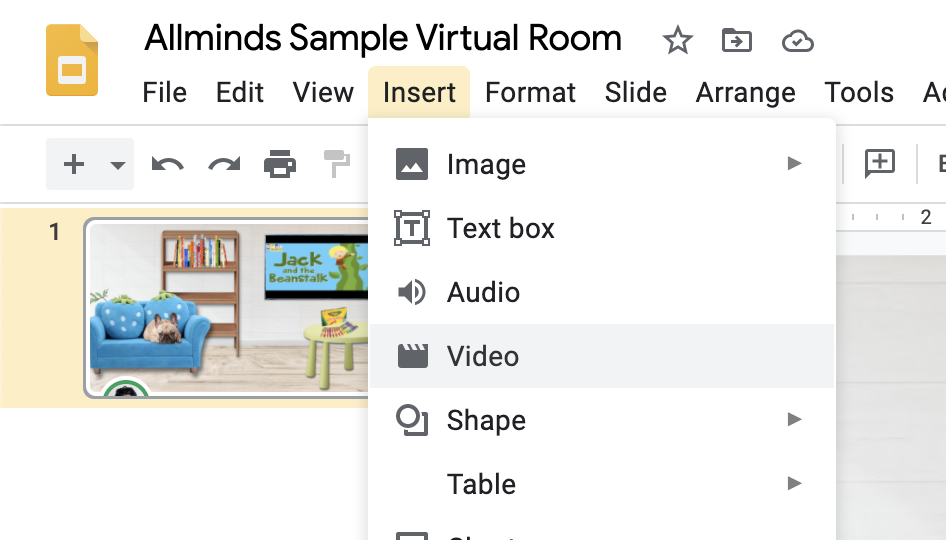
4. Embed videos in your virtual room
If you want to upgrade your virtual room even further, you can embed youtube videos so they can be played directly from your room! Here's how:
Using the upper toolbar, click on insert > video
In the window that pops up, click on the tab labeled “By URL” and then paste the URL of the YouTube video that you wish to insert

Click “Select”, and then resize and position the video wherever you want. That’s it!
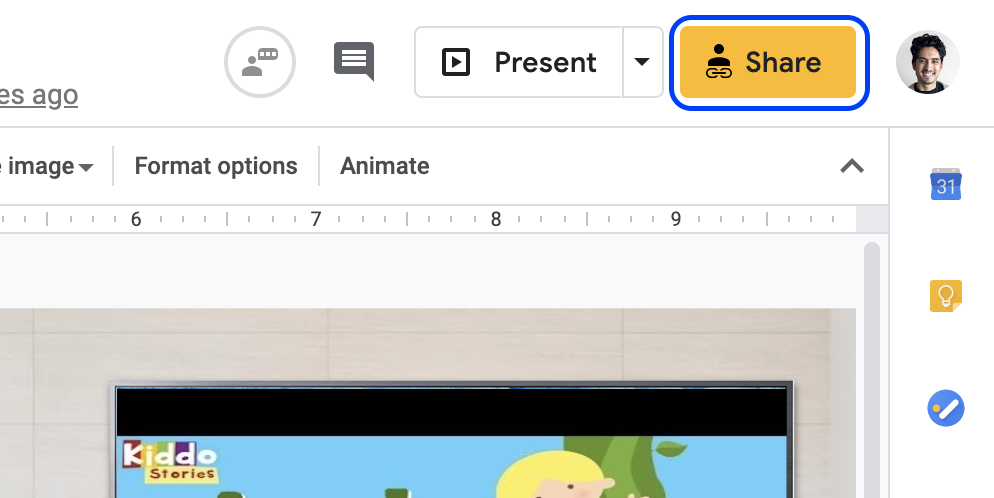
5. Share your room with your client
Click the "Share" button in the upper right corner
Check the privacy permissions in the bottom of the pop-up. If it says "Restricted", click on "Change to anyone with the link". This will allow your clients to easily access your room from any device, without any hassles.
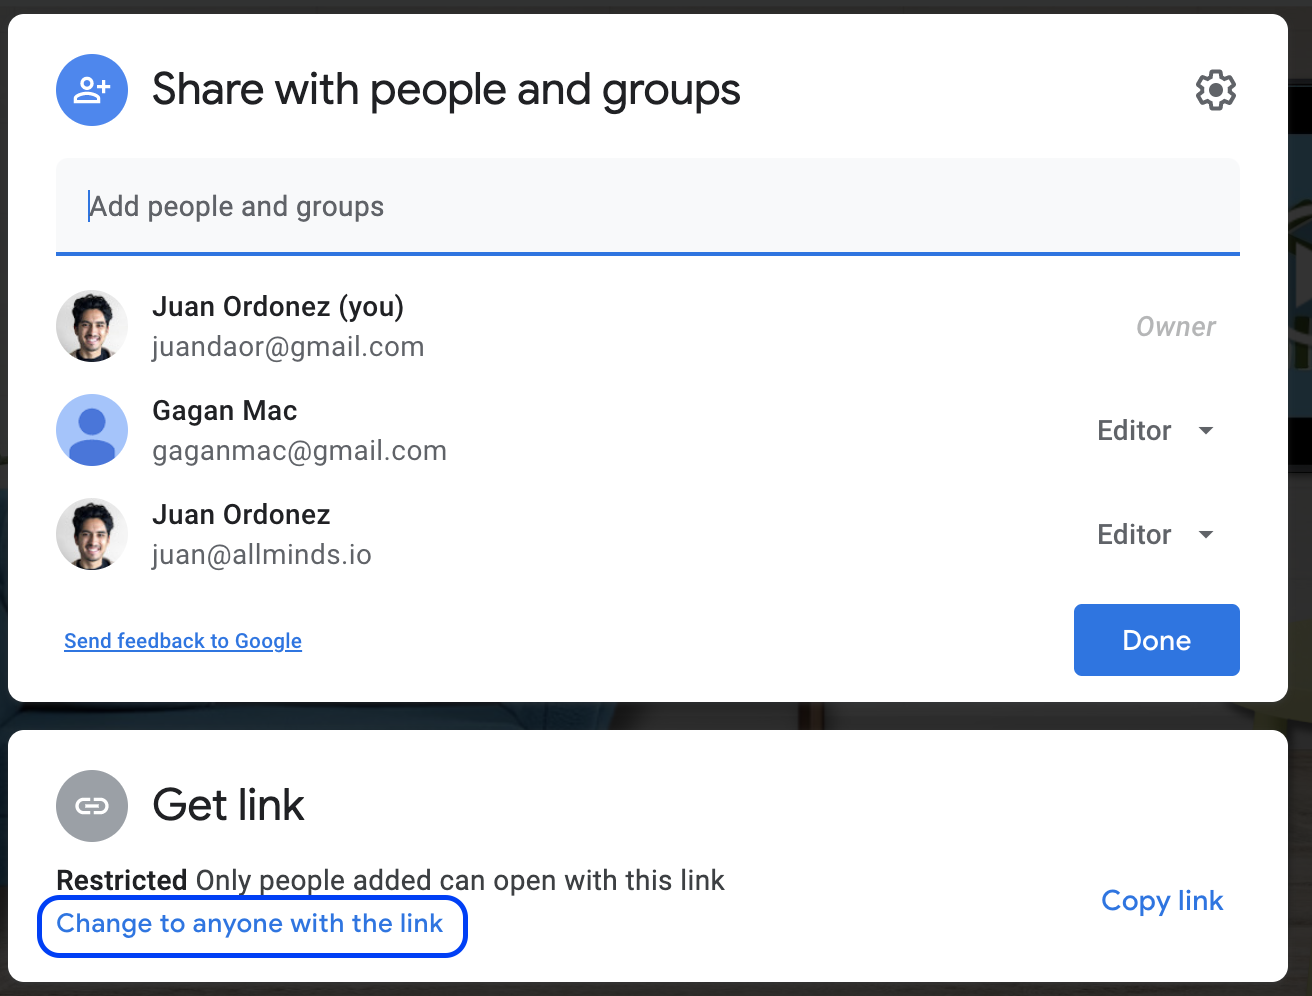
Next, make sure "Viewer" permissions are selected, not "Editor". This will prevent your clients from altering your virtual room, but still allow them to interact with it.
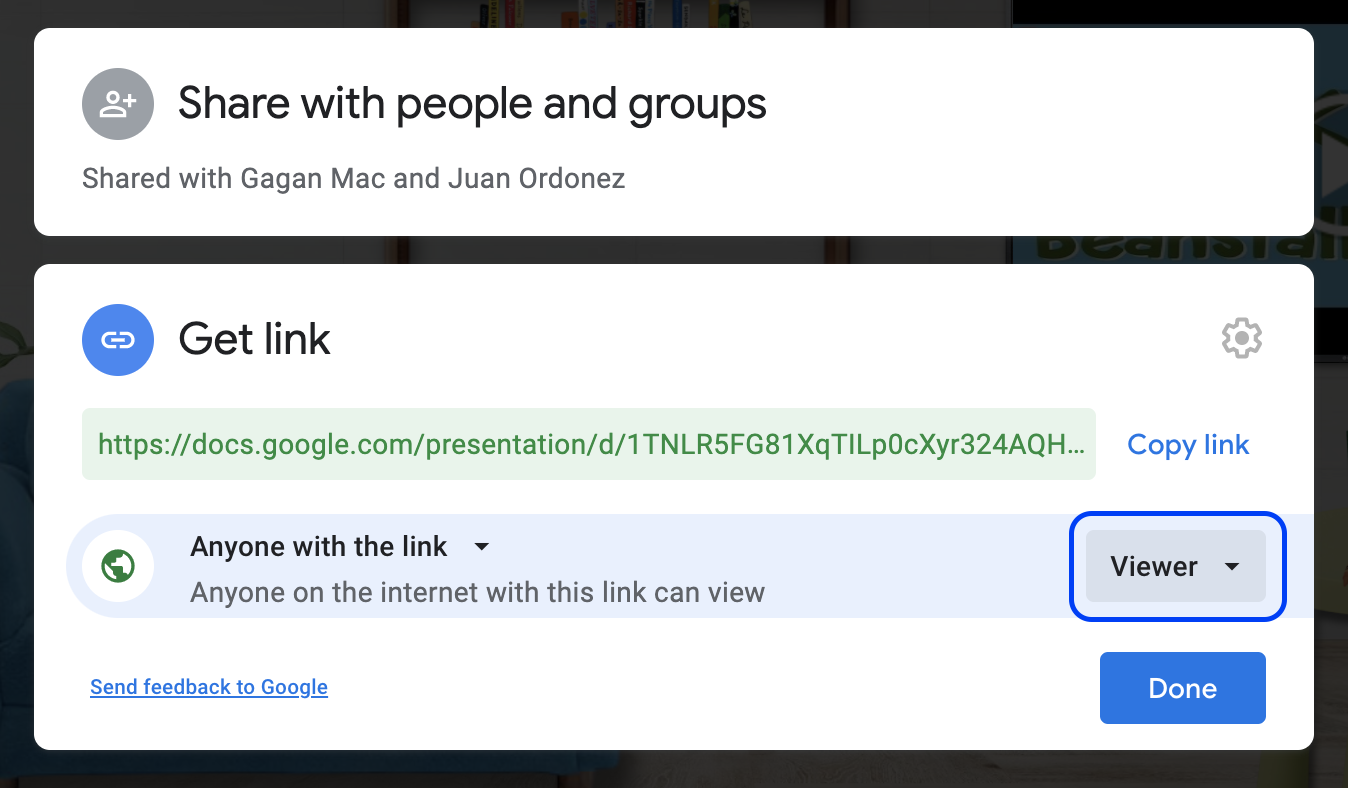
Click on the "Copy" button to copy the room's link. Send this link to your client.

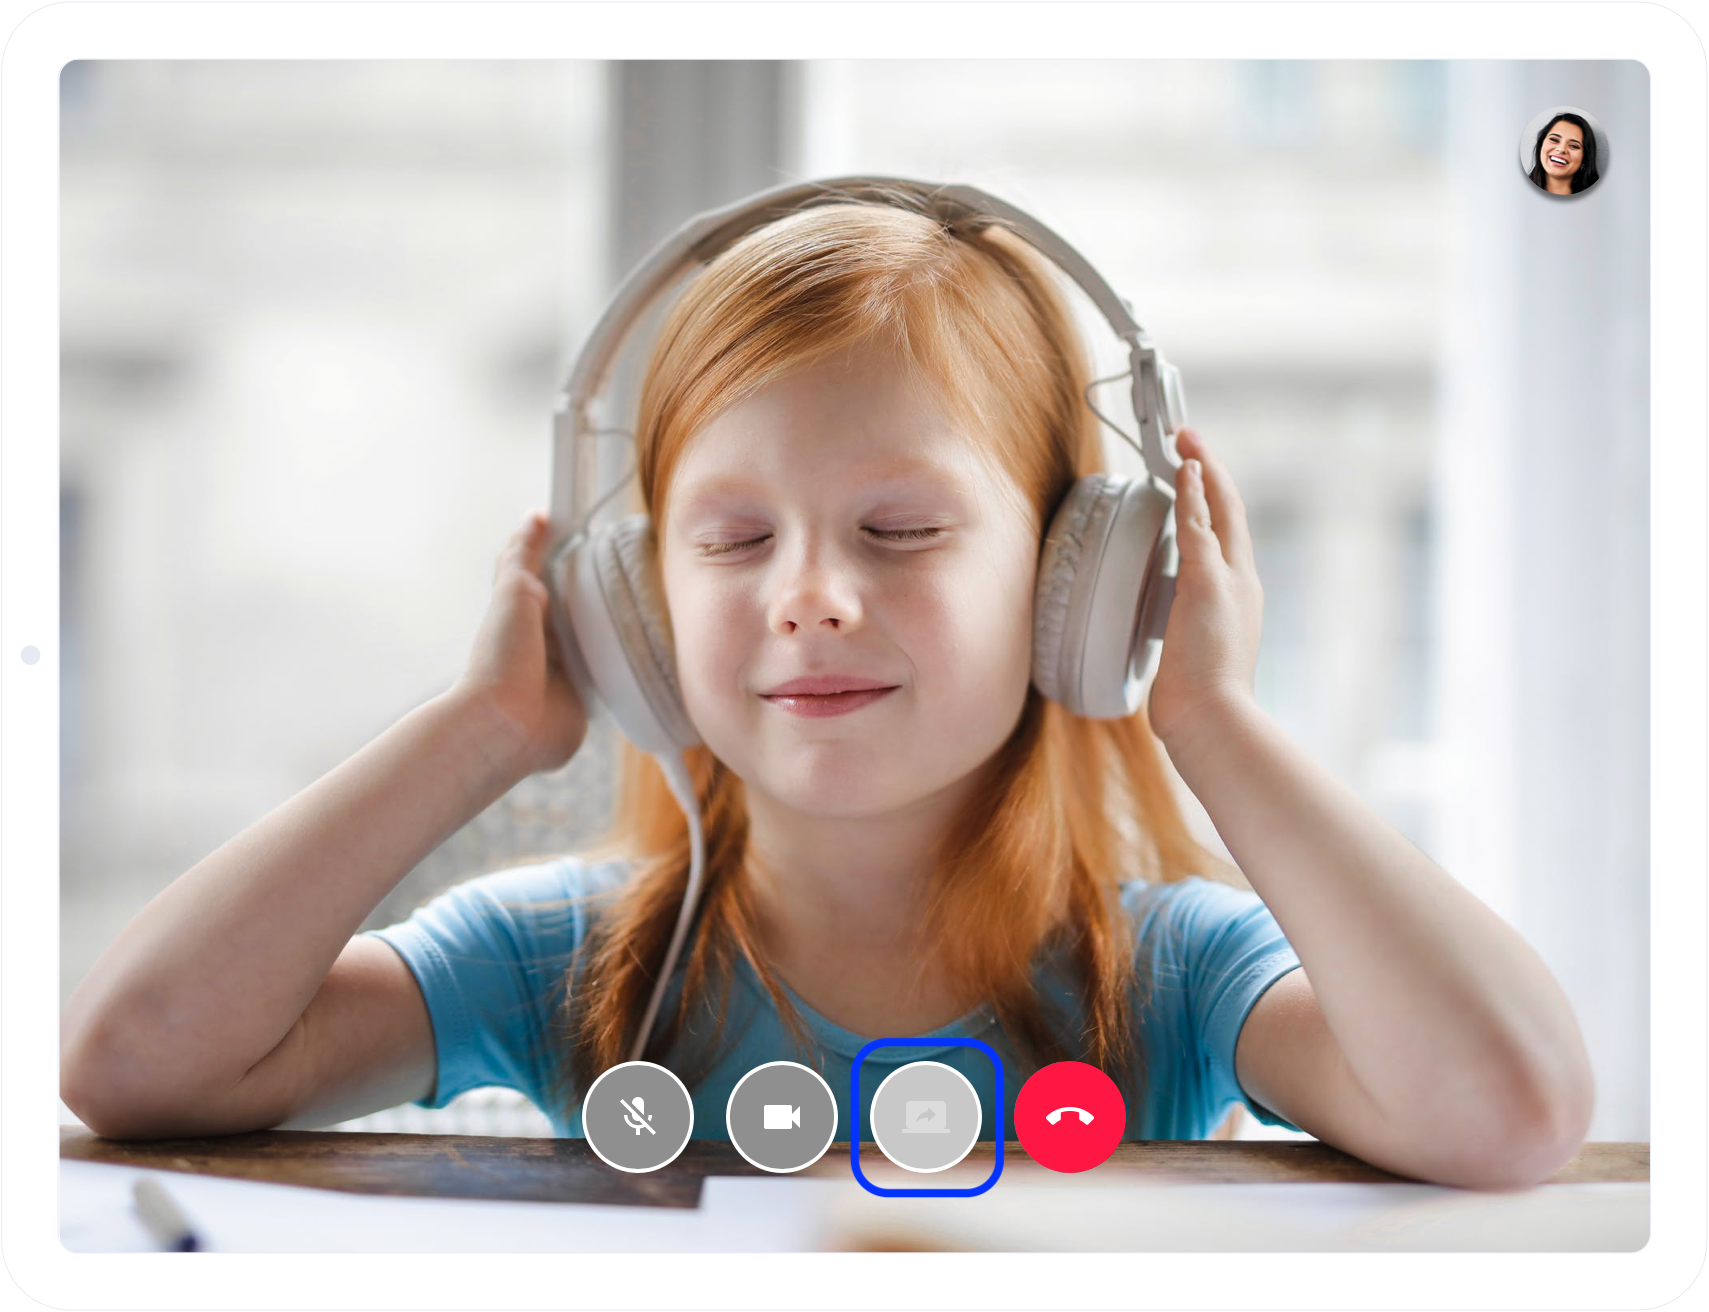
During the session, ask your client to share their screen with you through your Telehealth software. In Allminds, this can be done simply by clicking on the round “Share Screen” button.
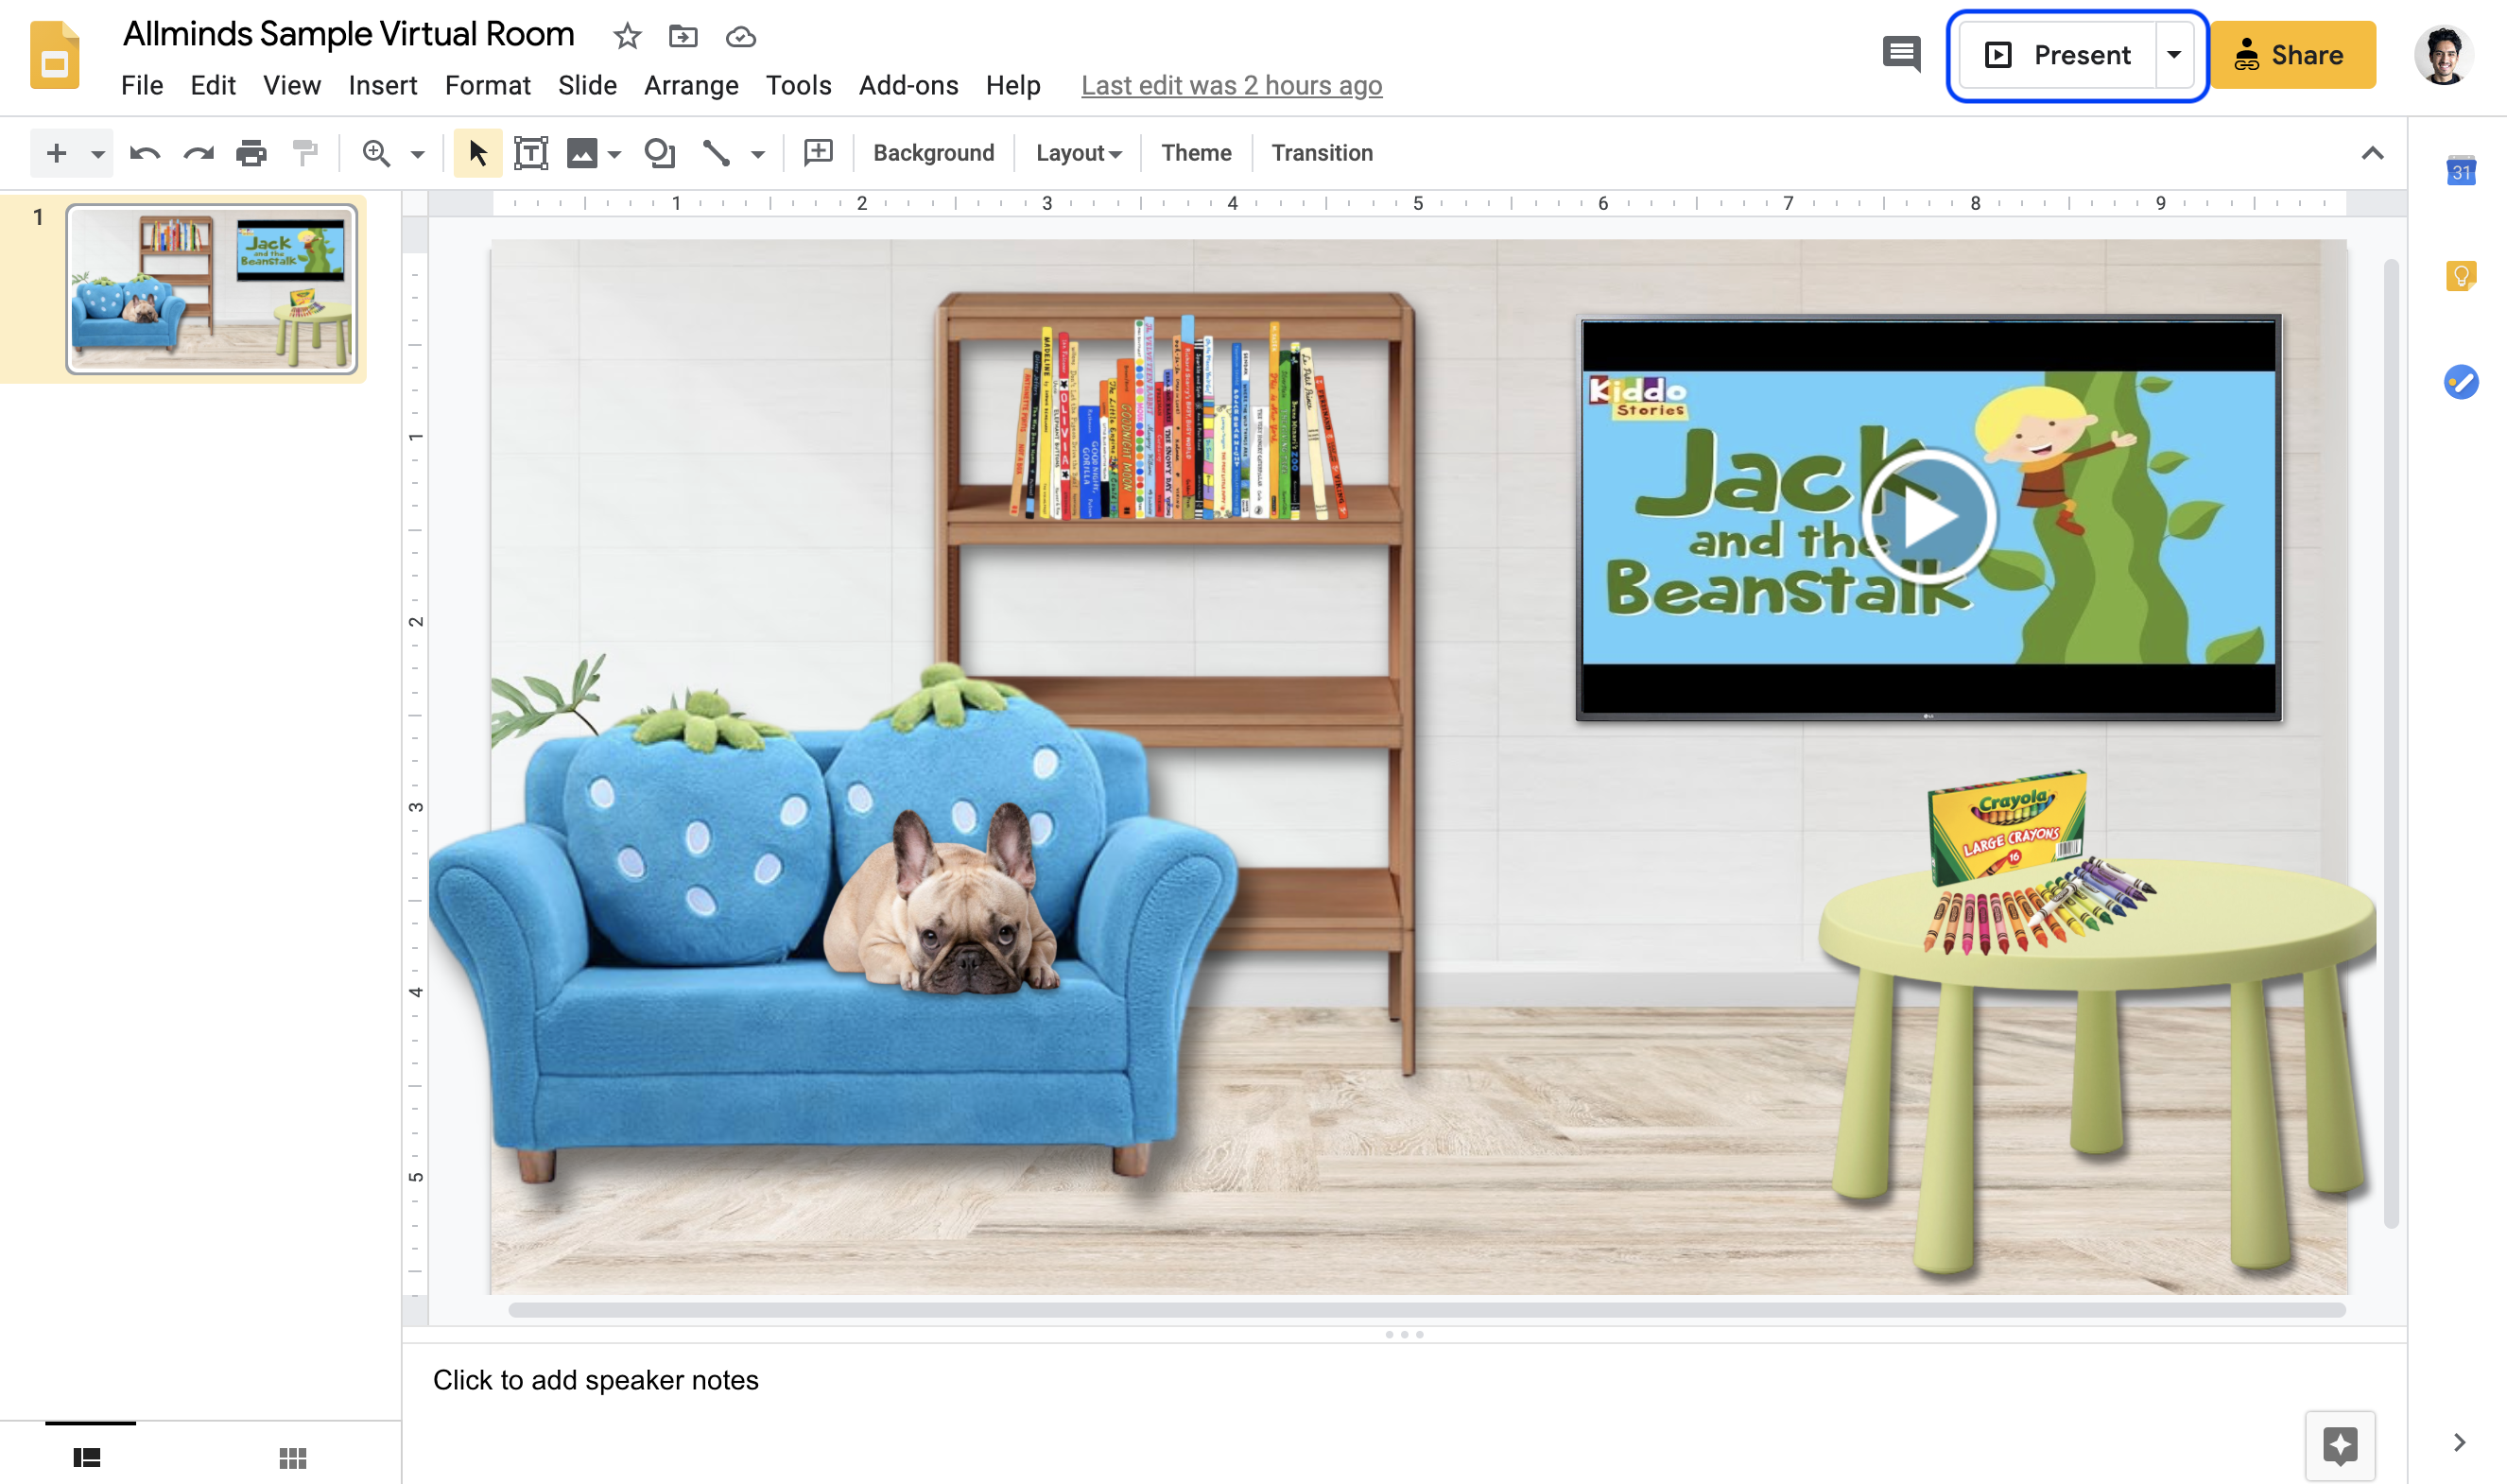
Next, ask them to open the virtual room by clicking on the link you previously shared with them, and ask them to click the “Present” button on the top right corner of the window.
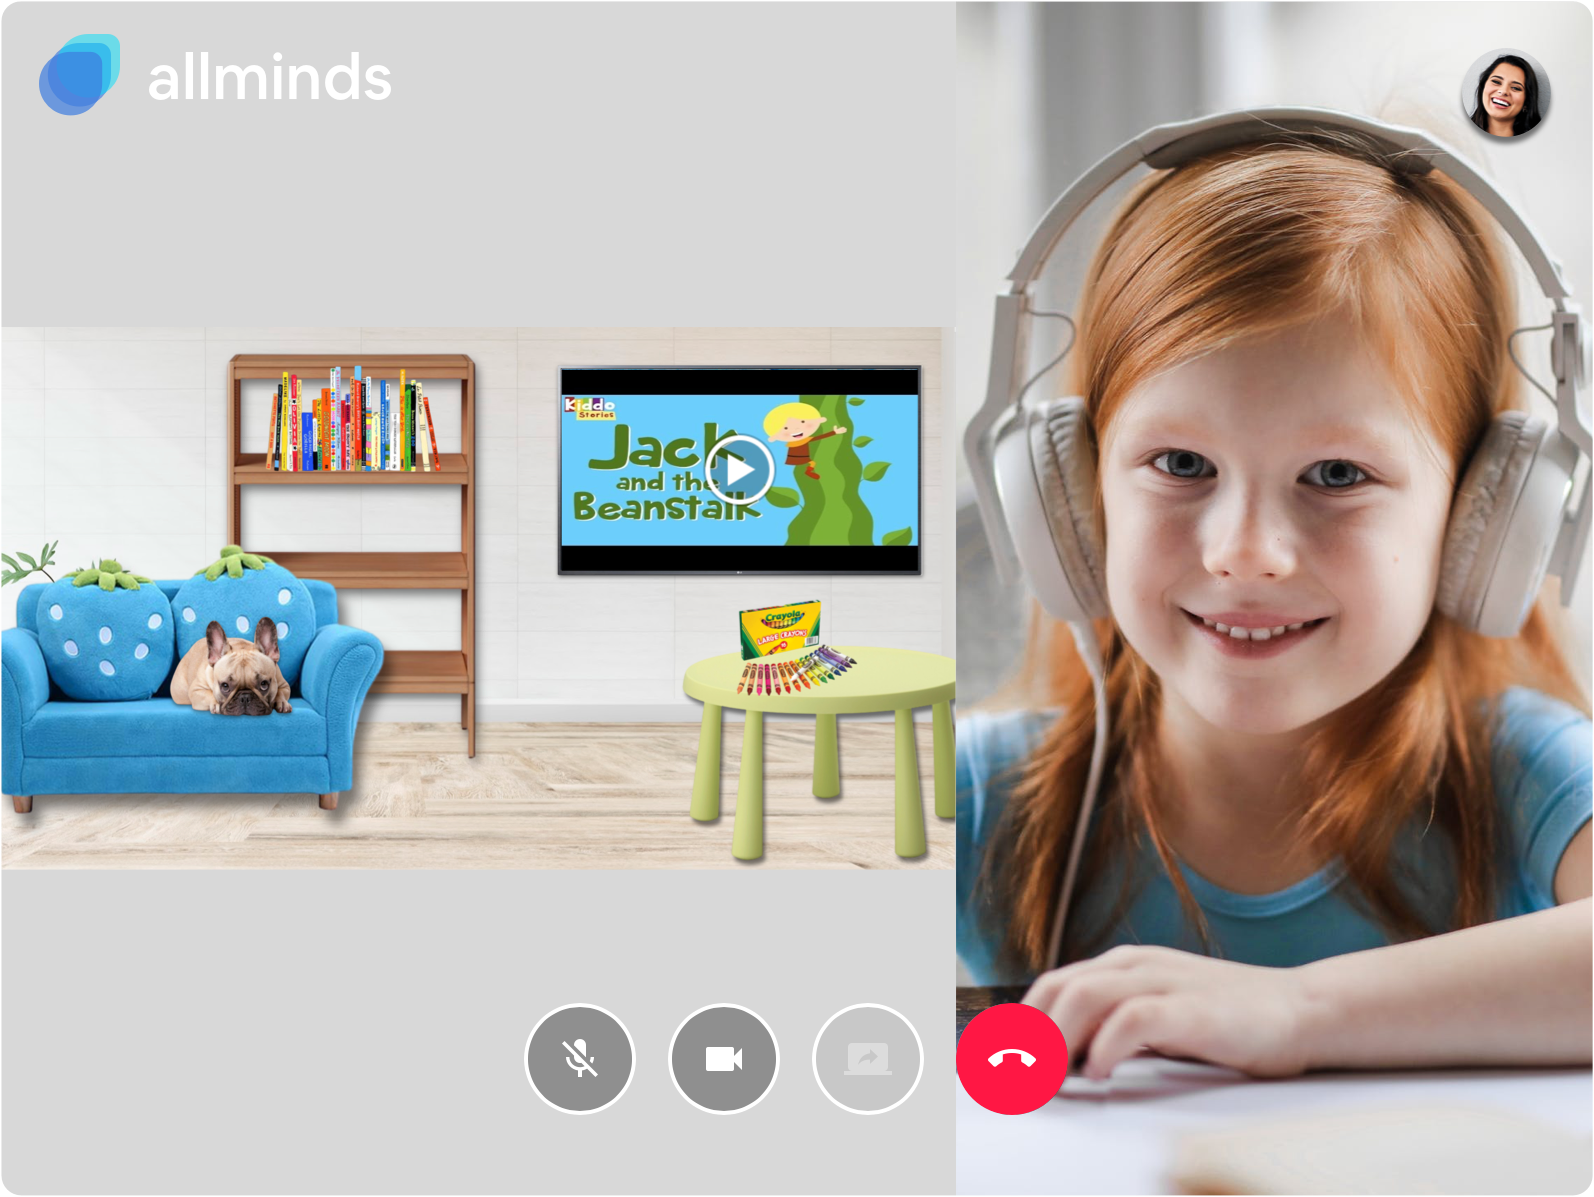
Your client can now click on any element in your virtual room, and you will be able to follow along!

Congrats! You’ve reached the end of this guide.
If you'd like to access more play therapy activities like an online sand tray, whiteboard and more, have a look at all the features Allminds has to offer.
Learn more